How do I create an assignment?
To learn how to create an assignment, follow the step-by-step instructions below:
Step-by-Step Instructions:
1. Click on 'Content' in the upper navigation bar.
2. Select a passage.
![](http://d33v4339jhl8k0.cloudfront.net/docs/assets/6287d60e811b0d01088261a3/images/62c8706a03382e4311cf2a88/file-g6KDyhpa59.png)
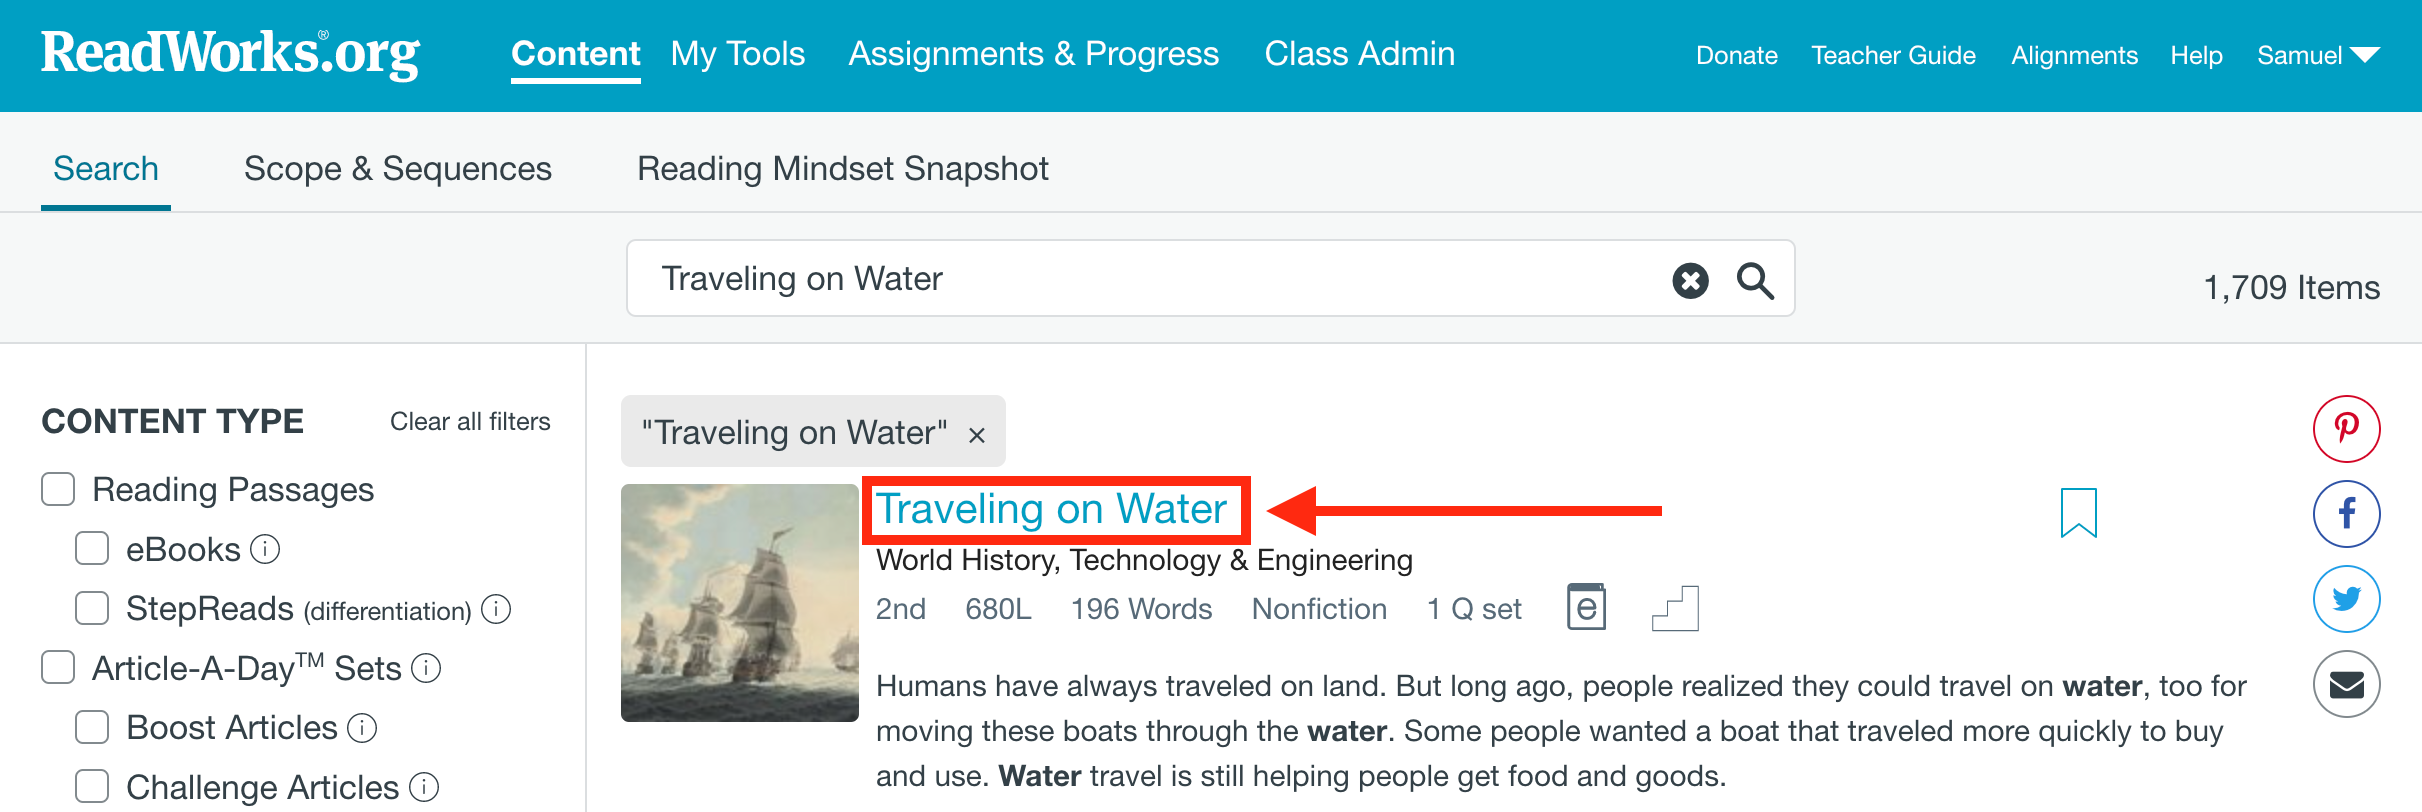
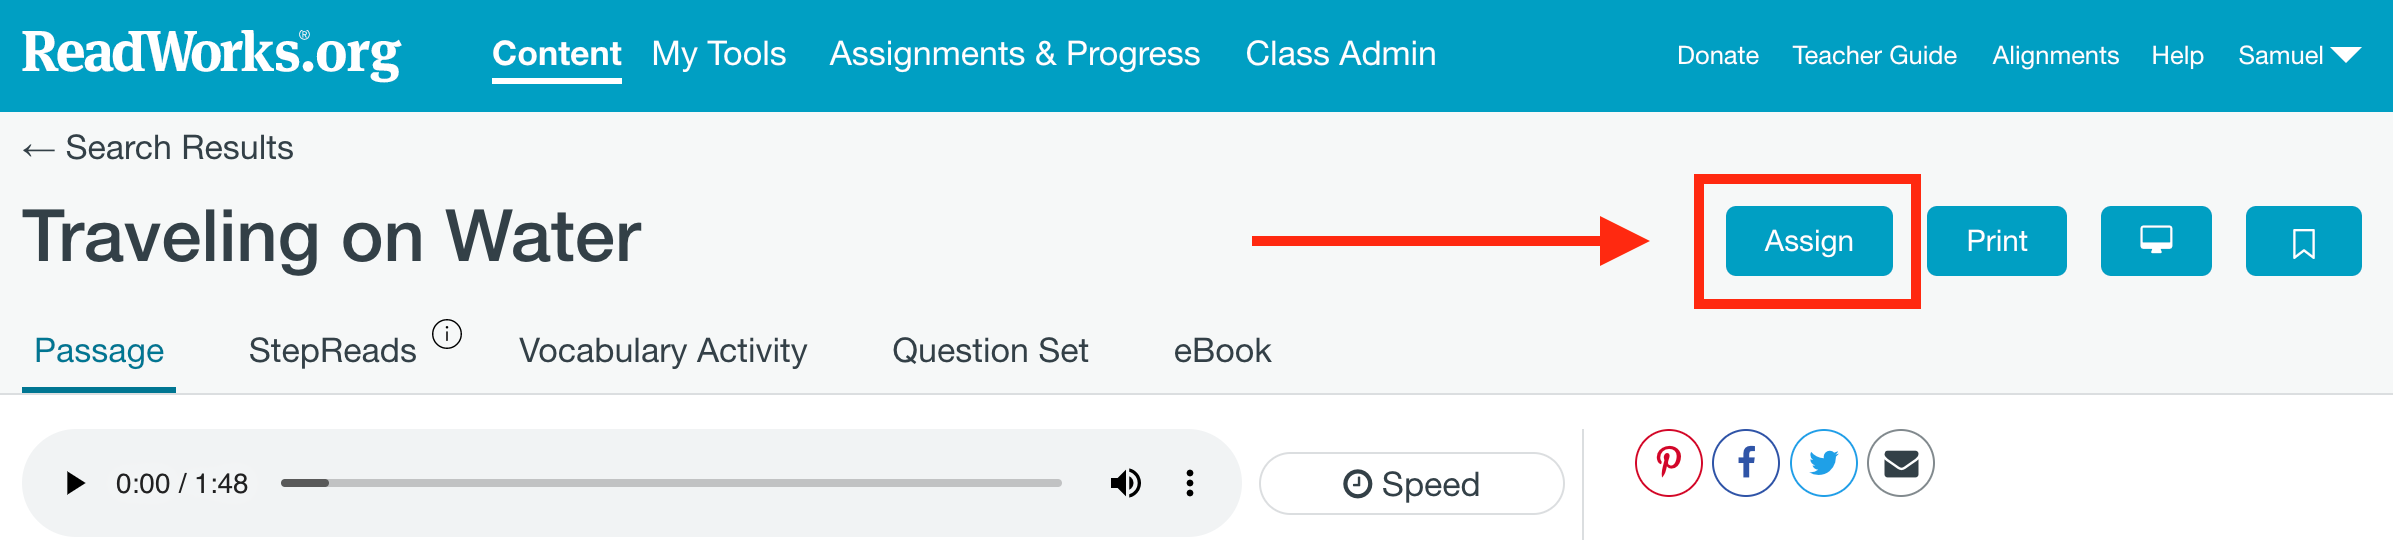
3. Click on the blue 'Assign' button.
![](http://d33v4339jhl8k0.cloudfront.net/docs/assets/6287d60e811b0d01088261a3/images/62c870e103382e4311cf2a8b/file-lqXHKk4y48.png)
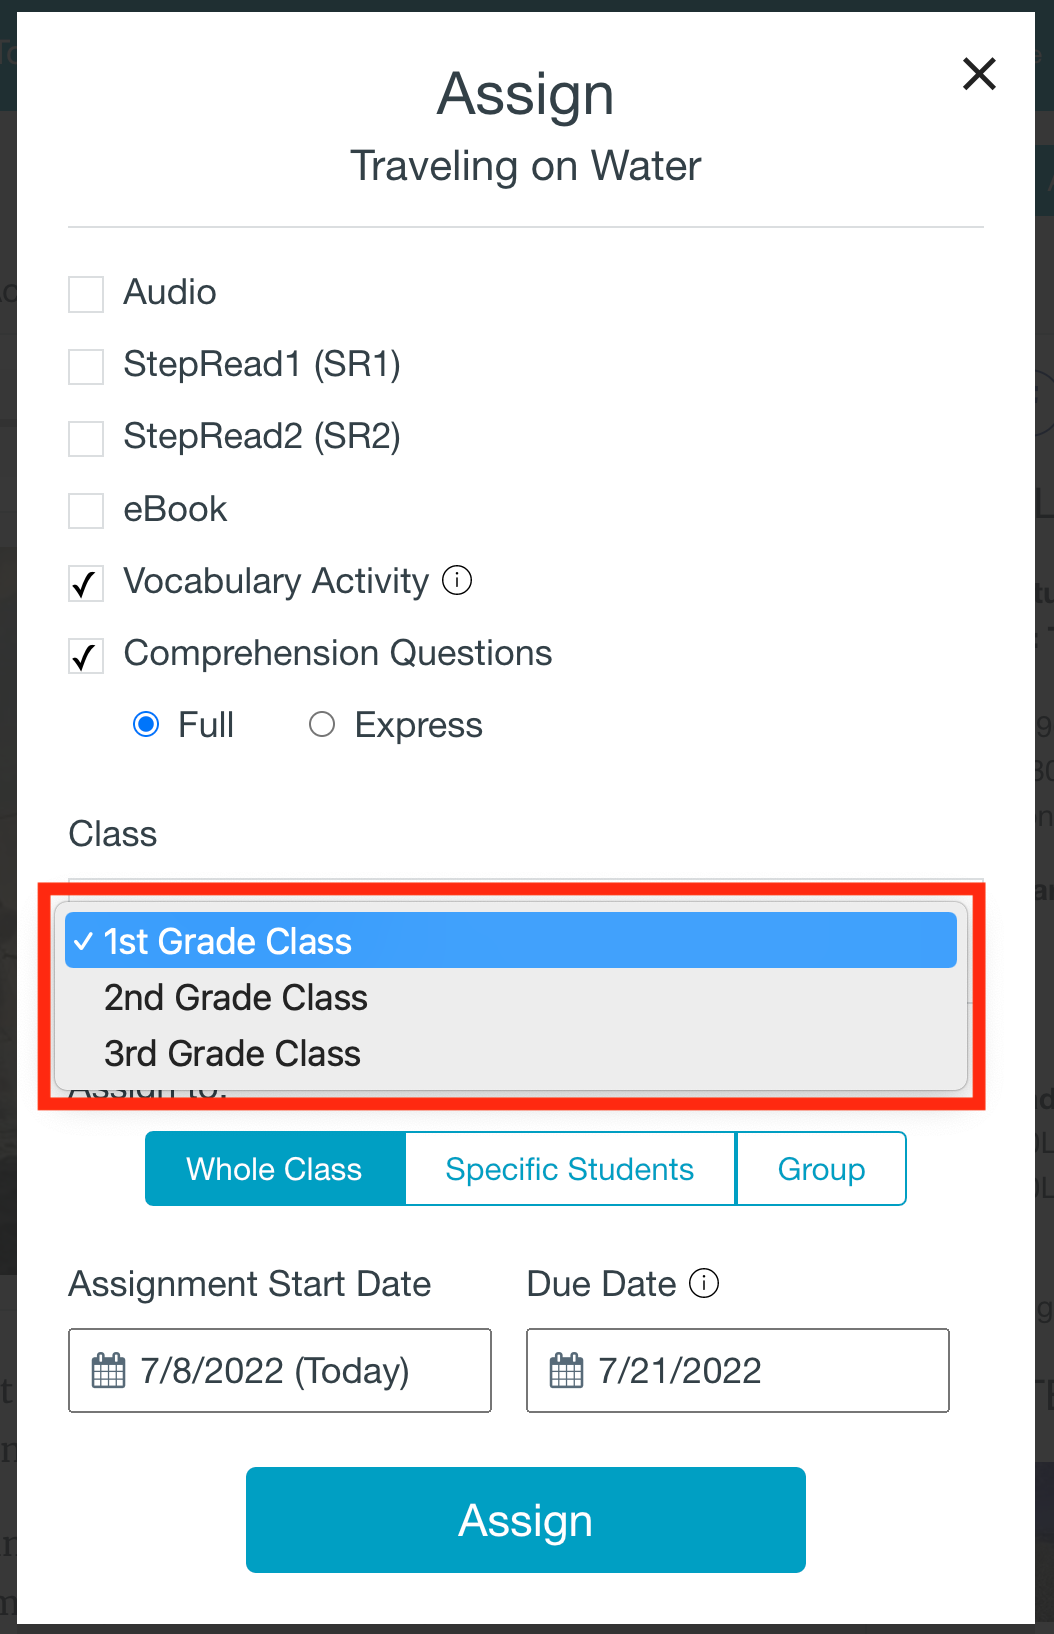
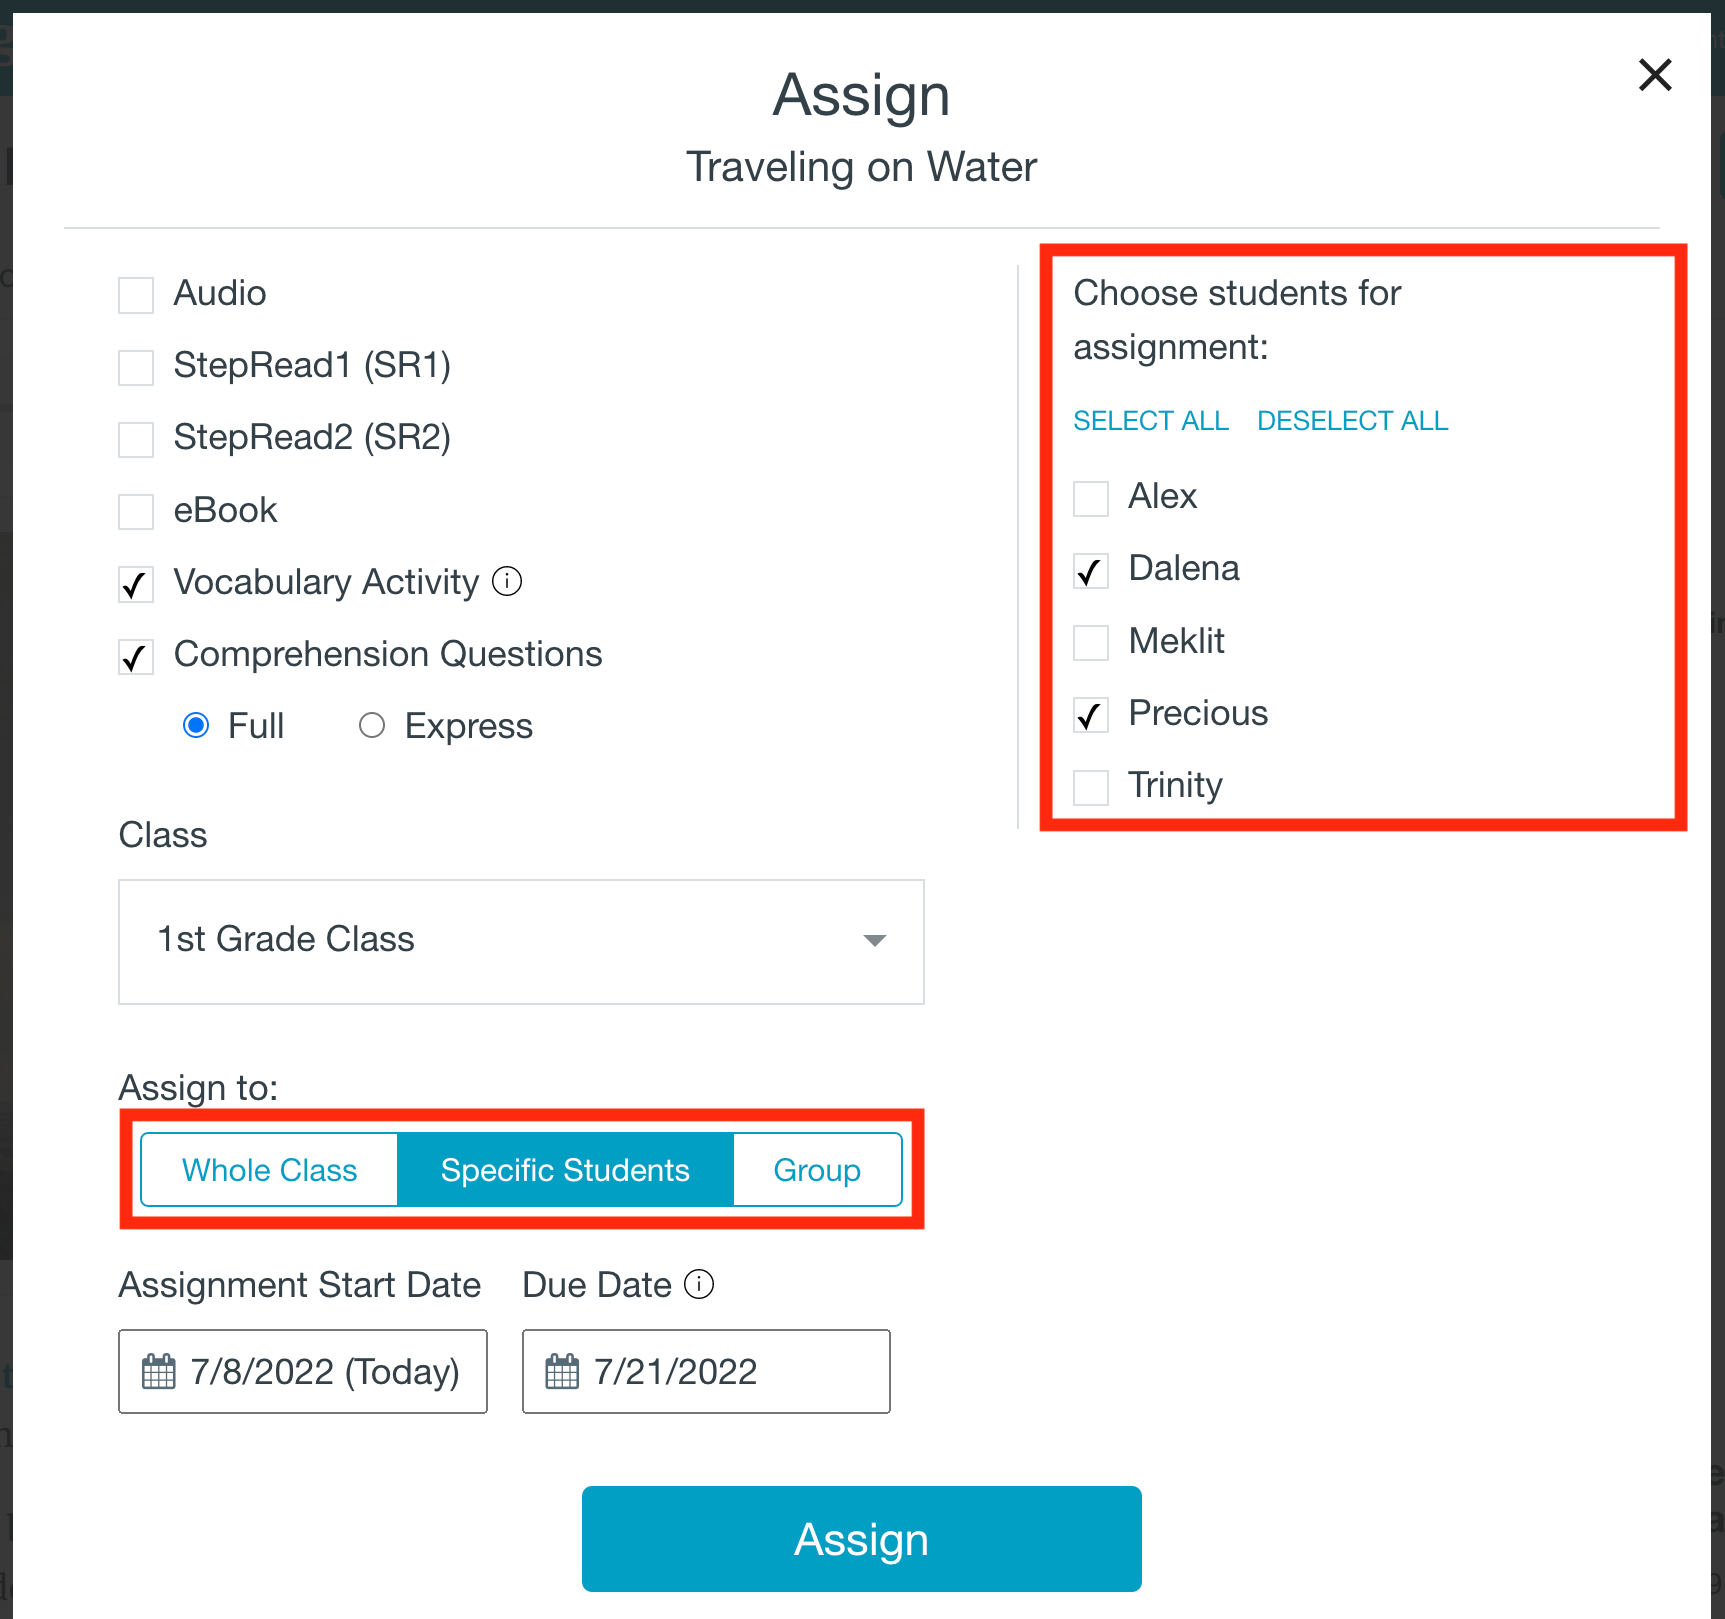
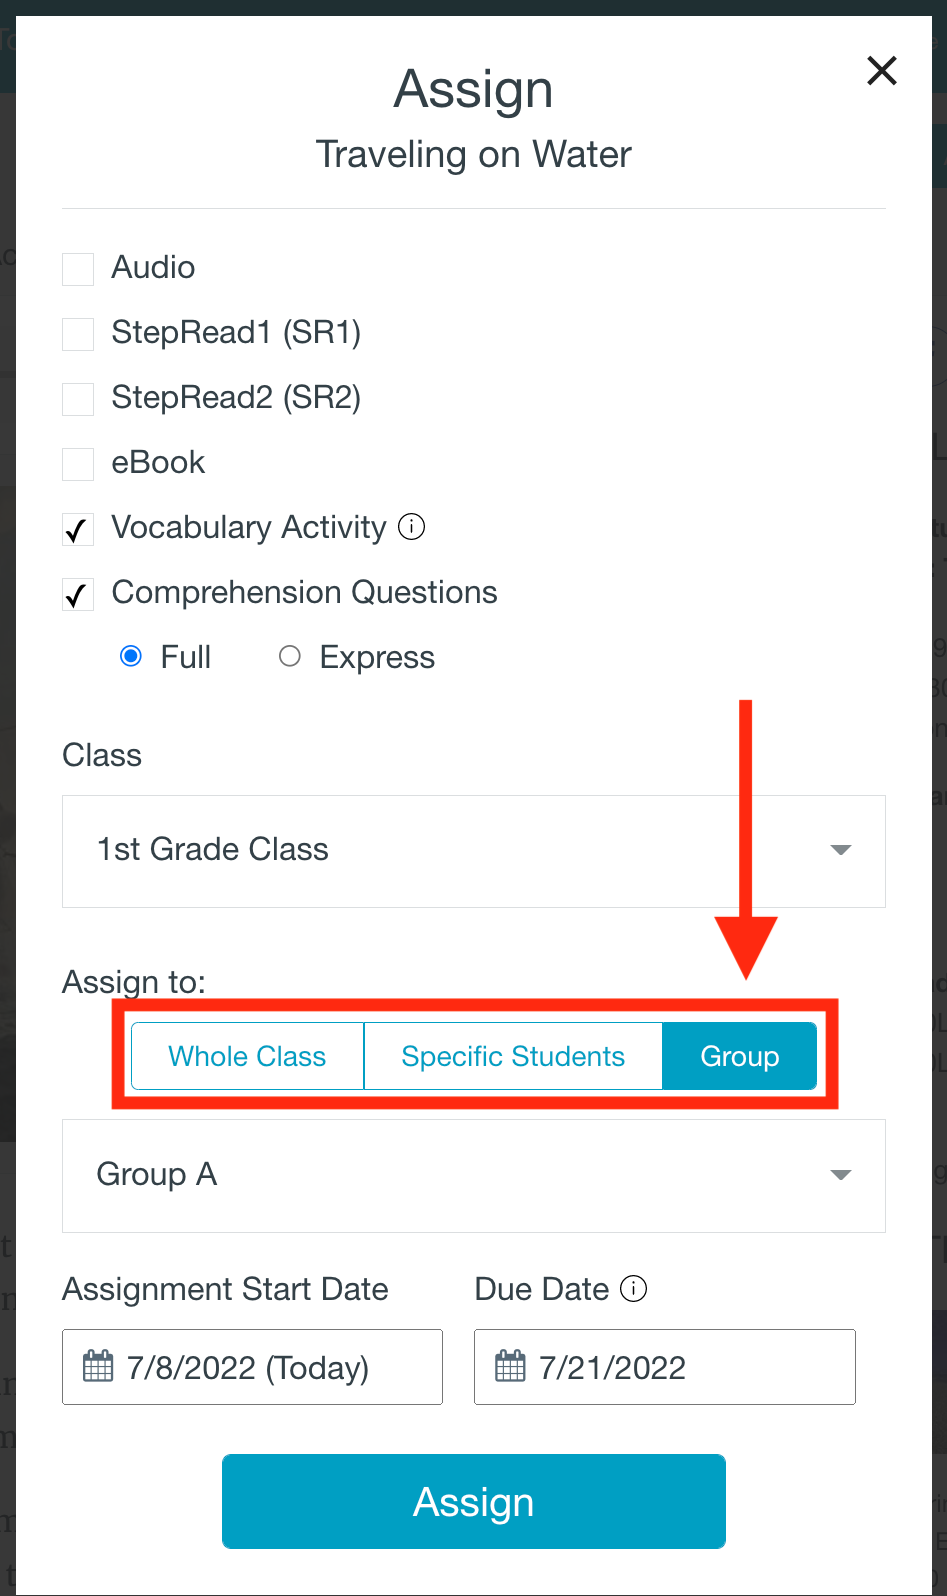
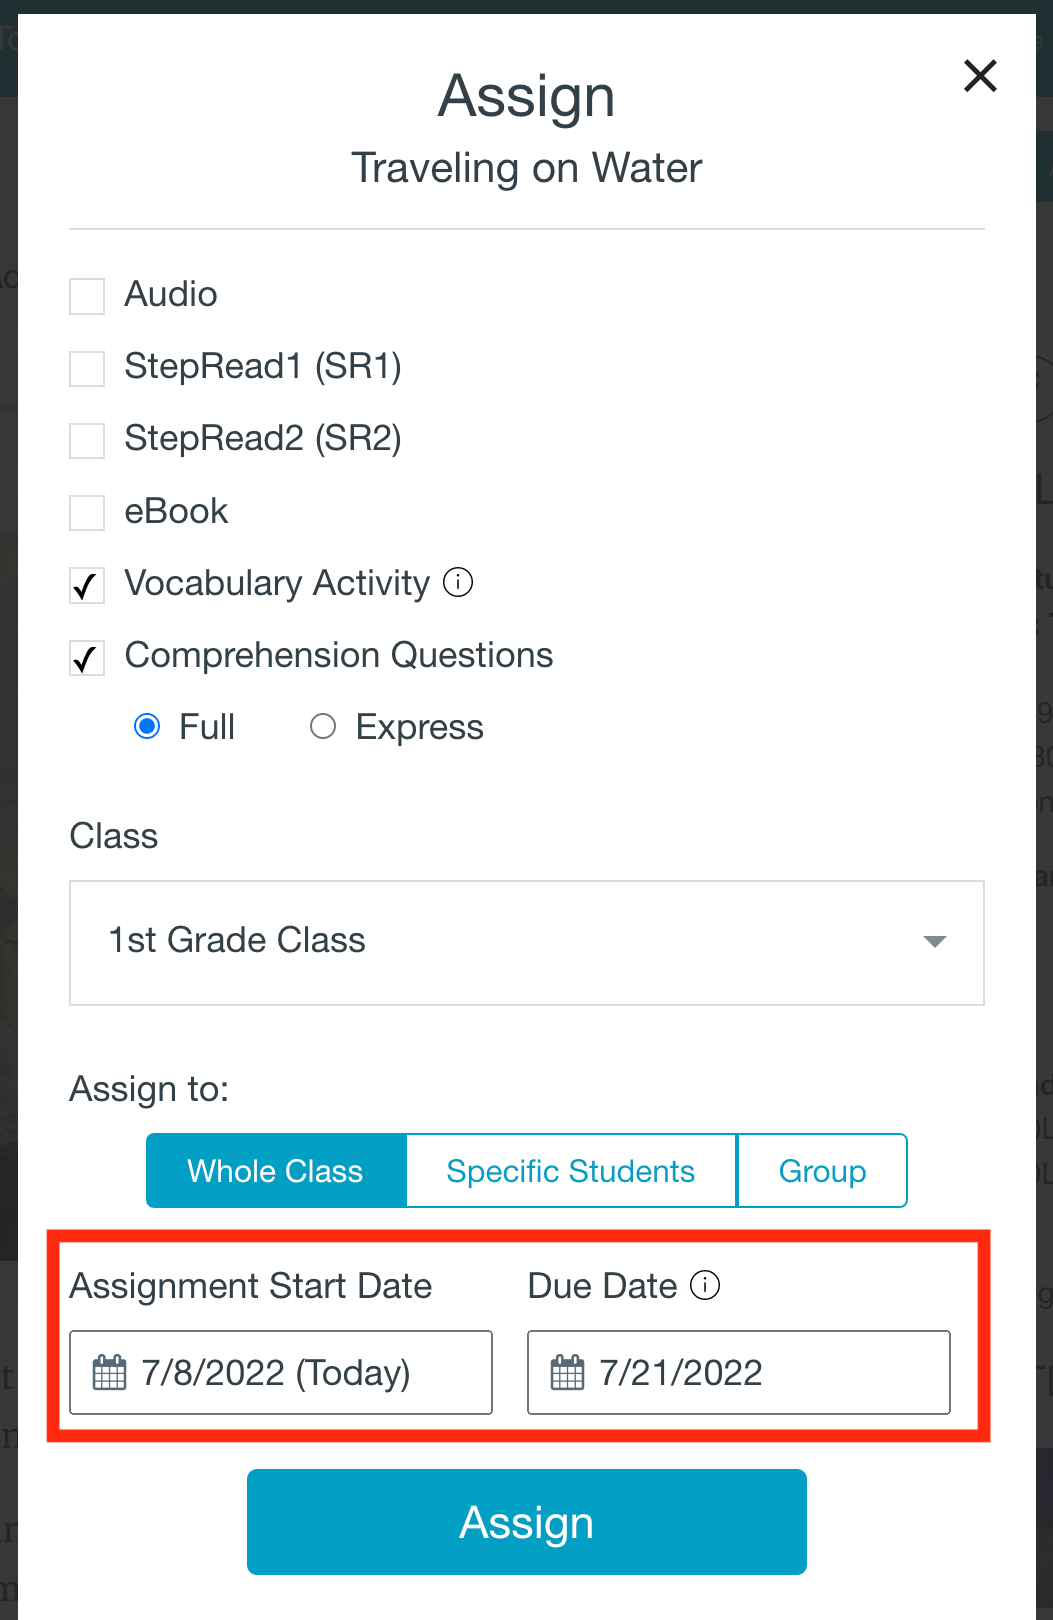
4. Check the curricular supports that you would like to assign.
![](http://d33v4339jhl8k0.cloudfront.net/docs/assets/6287d60e811b0d01088261a3/images/62c8755e03382e4311cf2a9d/file-VV0uRWYCRX.png)
5. Select your class from the drop-down menu.
![](http://d33v4339jhl8k0.cloudfront.net/docs/assets/6287d60e811b0d01088261a3/images/62c8757003382e4311cf2a9e/file-OHmW805YnG.png)
6. Choose whether you would like to assign the article to the whole class, to specific students, or to a group of students.
![](http://d33v4339jhl8k0.cloudfront.net/docs/assets/6287d60e811b0d01088261a3/images/62c87580d242501d78c629dc/file-O5s5vEbw3G.png)
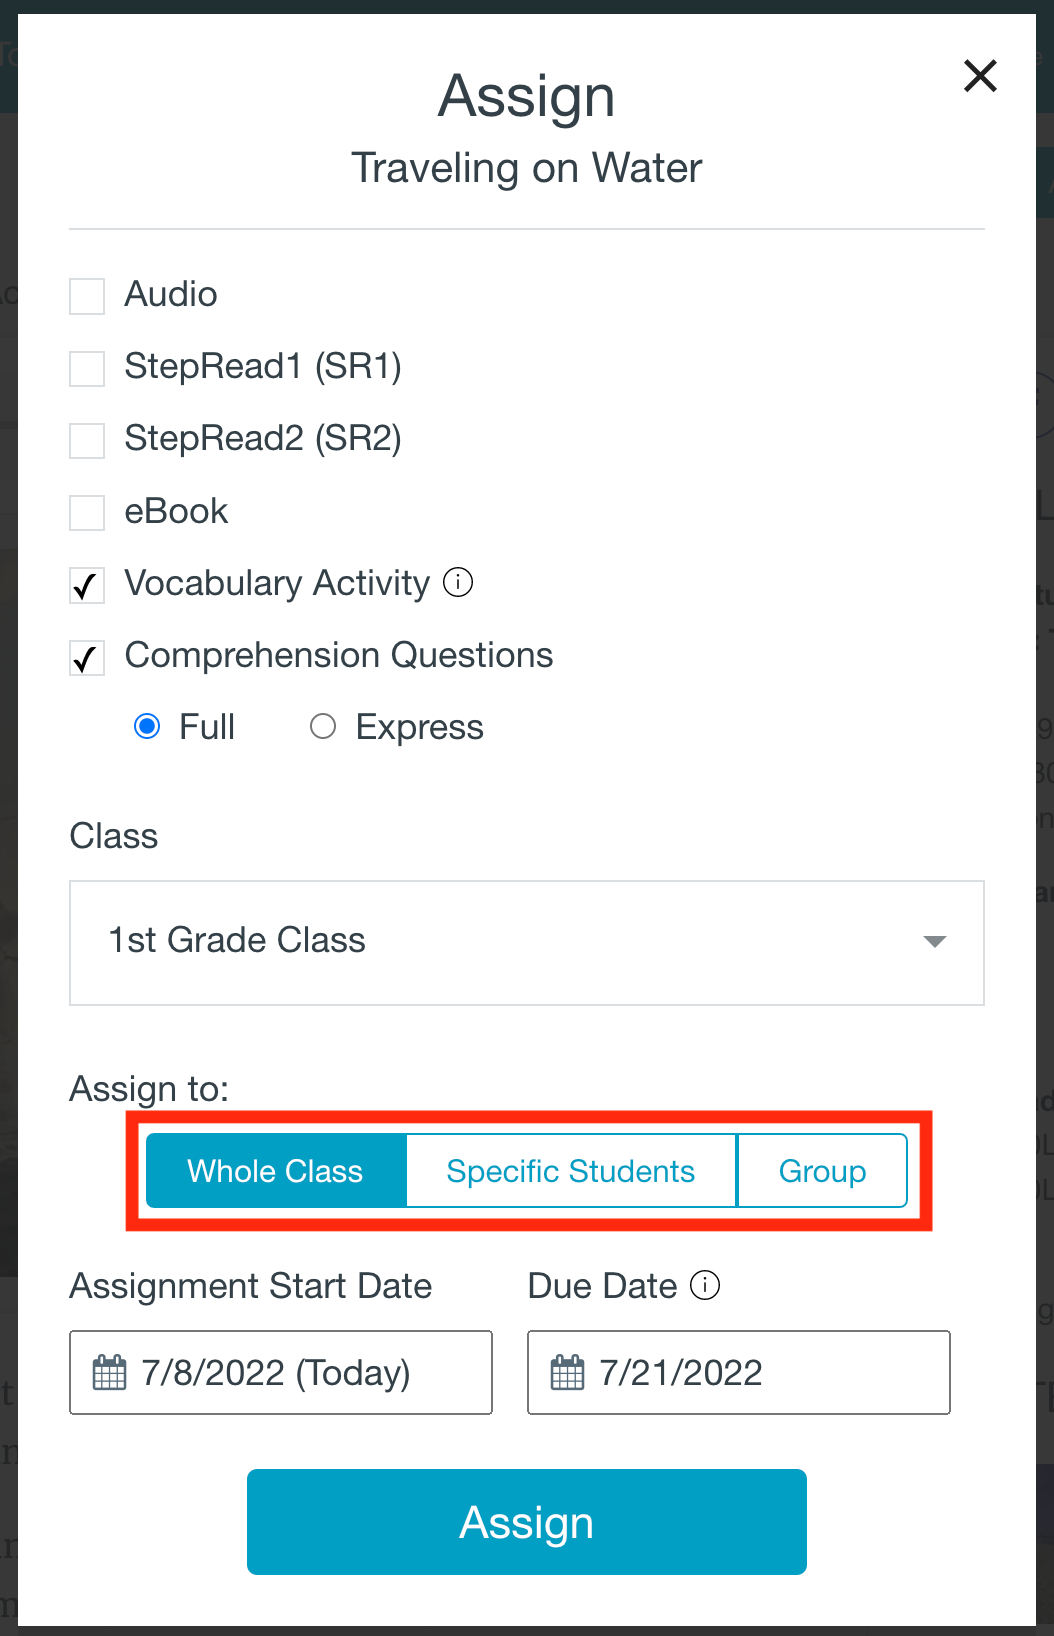
If you choose to assign to specific students, select those students by checking the checkbox next to their names.
![](http://d33v4339jhl8k0.cloudfront.net/docs/assets/6287d60e811b0d01088261a3/images/62c87591c74a080359c87f3c/file-AtUXvuXxU0.png)
If you choose to assign to a group of students, use the drop-down menu to select the group.
![](http://d33v4339jhl8k0.cloudfront.net/docs/assets/6287d60e811b0d01088261a3/images/62c8759eeabe9a7235b3beda/file-ddTguJMQQY.png)
7. Select the assignment start and due date by clicking into each box and selecting a date from the pop-up calendar.
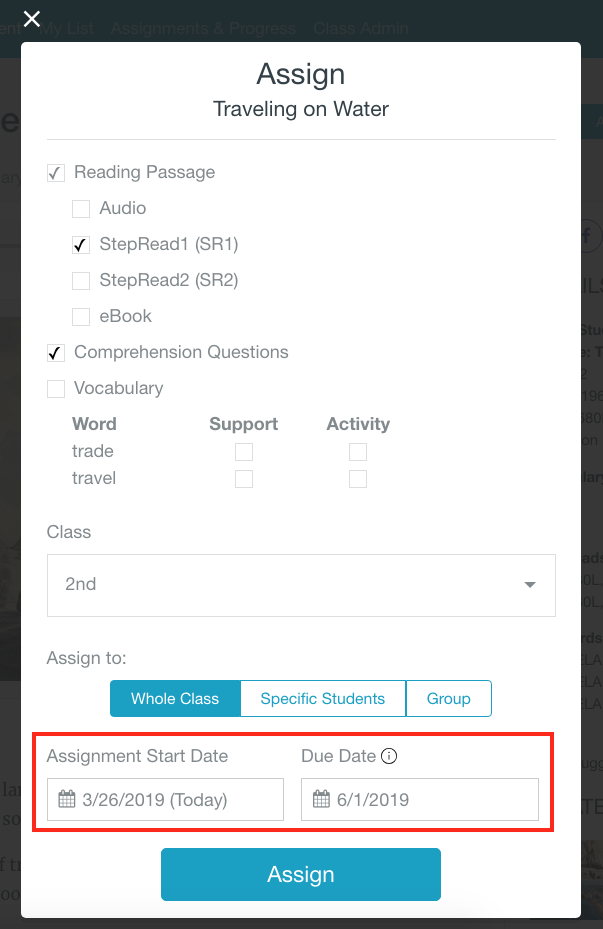
NOTE: If you don't select your own due date, the due date will be set to two weeks after the assignment start date.
![](http://d33v4339jhl8k0.cloudfront.net/docs/assets/6287d60e811b0d01088261a3/images/62b1cf20b2955b2490b58d1d/file-CkdqCX22G9.png)
![](http://d33v4339jhl8k0.cloudfront.net/docs/assets/6287d60e811b0d01088261a3/images/62c875aceabe9a7235b3bedc/file-7crqoibm4x.png)
8. Finally, click the blue 'Assign' button!